Connector Documentation
The documentation below contains information on how to write a connector. It provides a sample REST API, which will be used to provide hands-on examples, so each and every step can be comprehended locally on your machine.
First, we are going through the requirements and setting up the REST API on your local system. Afterwards we will continue with documentation, which is divided into the following parts:
- Terminology
- The target API
- Create a derivation graph
- Create a Client
- Create a connector
Requirements#
Initially you should make sure you have the following installed:
Additionally, you need to clone the following three repositories:
Setup#
Next we want to set up the three projects you previously pulled.
Sample API#
First, you need to build the OCI image locally using Docker. To achieve this simply run the following command from within the project directory
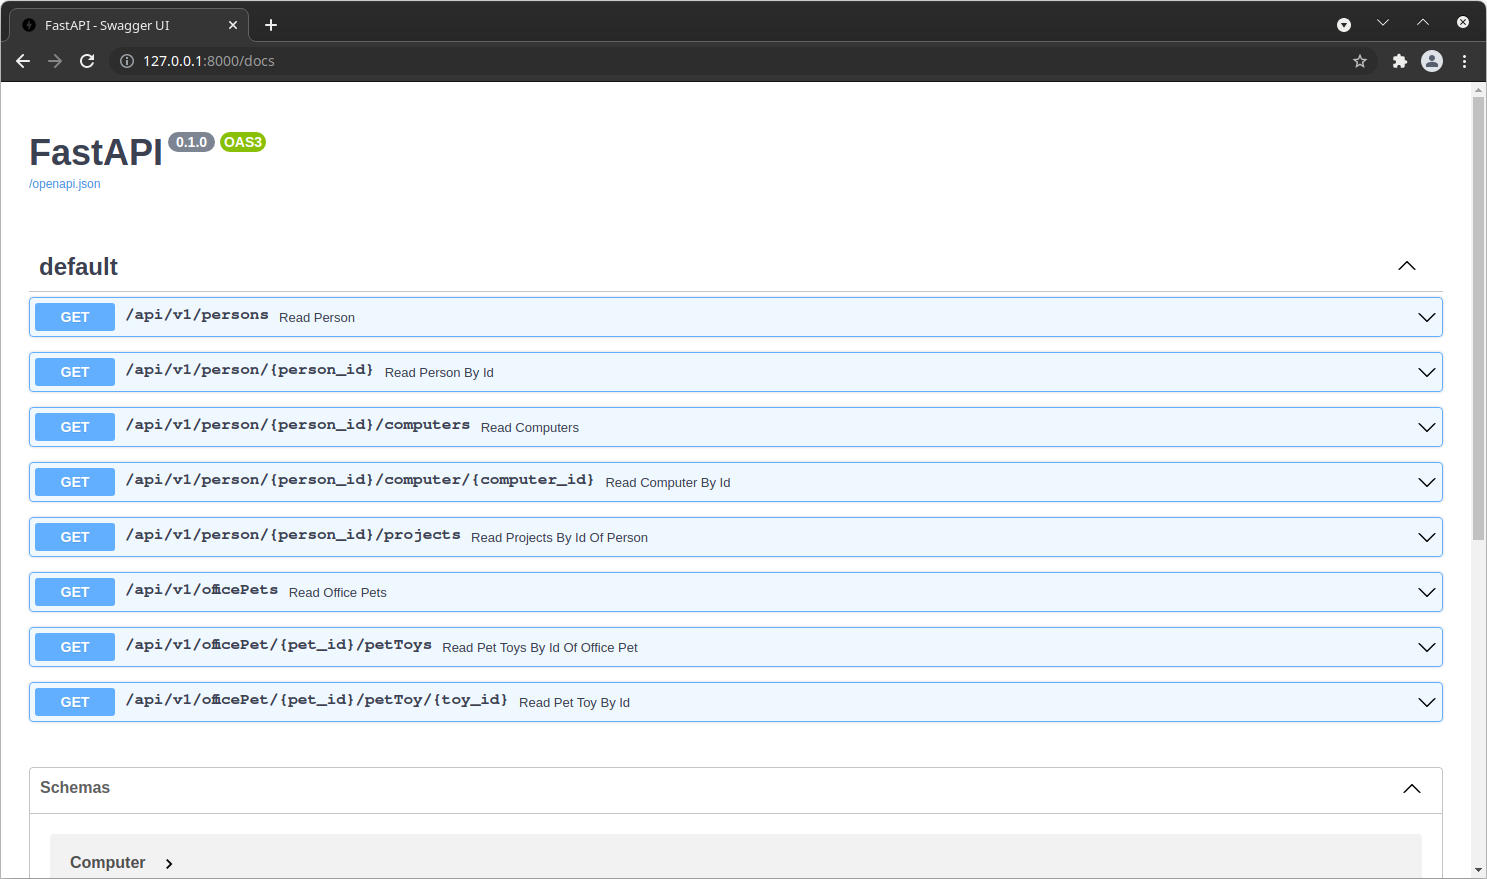
The API should instantly become ready on http://127.0.0.1:8000. You can easily verify it by visiting http://127.0.0.1:8000/docs. If everything went well, the FastAPI Swagger UI should become available.
Sample API Client and Sample API Connector#
These two projects use gradle with the idea plugin. So you can easily import them with IntelliJ by using ./gradle
openIdea
Importing the projects#
The projects are managed by gradle. Additionally, they make use of the idea plugin. This makes it easy for you to
import it with IntelliJ. You just need to import the project with Gradle as the build system.
Terminology#
System: A system can be anything that provides data. For example a system could be:- REST/SOAP endpoint
- a file like a CSV
- a database
The target API#
We have provided a small example Toy API for this documentation. You can explore it on http://127.0.0.1:8000/docs. The API has been kept simple on purpose.
In the end you should see, that there are in total 5 entities
PersonComputerProjectOfficePetPetToy
and that there is a way to retrieve them from the API. For example, you can
call http://127.0.0.1:8000/api/v1/persons to get all available instances
of Person.
Create a derivation graph#
From this toy example it can be easily read how the entities are related.
- Without any information we get all
Person. - From
Personwe can then get allComputer. - From
Personwe can then get allProject. - Without any information we get all
OfficePet. - From
OfficePetwe can then get allPetToy.
The root-Node marks the start. This would be a graphical representation of the structure we described just now.

Create a Client#
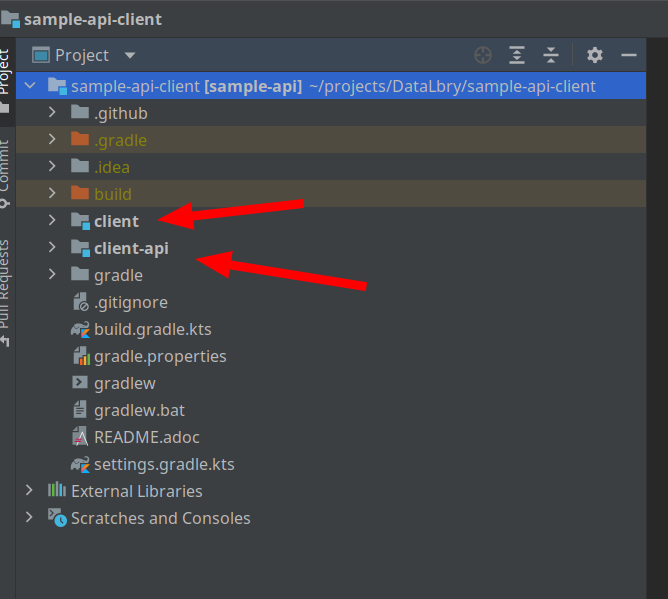
Next we need to create a client which can get us the data from the API. This has already been prepared for you. Now you should open your IDE of choice with the Sample API Client project.
NOTE: We split a client into two parts. An API and the actual implementation. This is primarily being done for inversion of control, so a consumer (such as the Connector) can rely on the API, and only requires the actual Client implementation at runtime.
In the client-api are the models and the interfaces which specify the client fragments. In this case the client is split into two parts. One for the person another for the office pet.
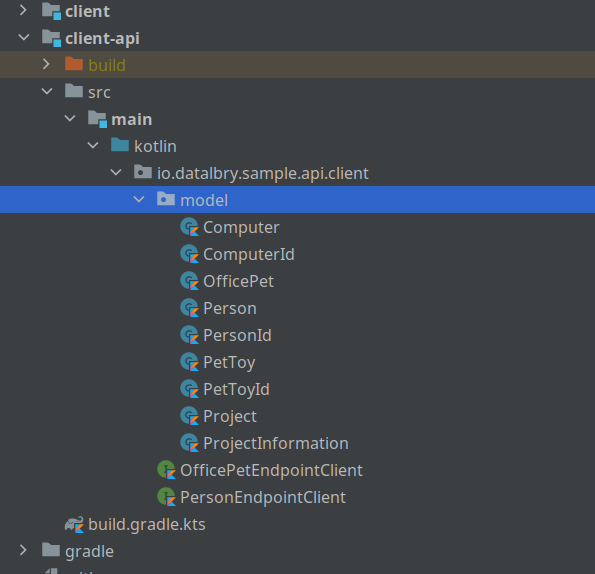
The models are identical to what the API provides us. This is because feign can thereby parse with jackson the returned values.
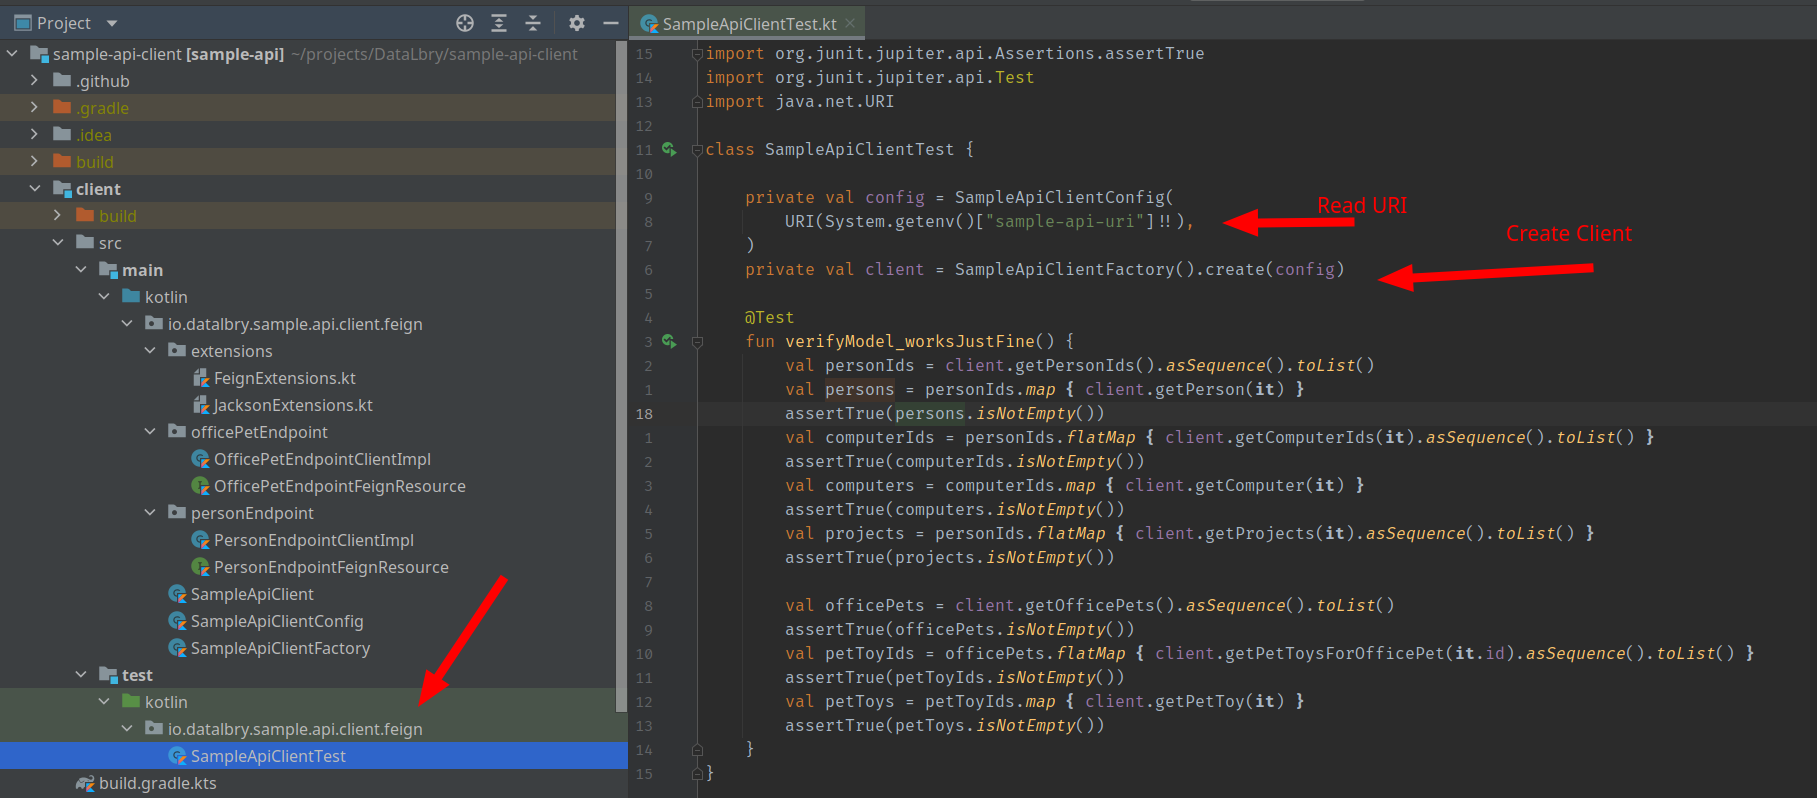
The client then contains the actual implementation of the client fragments. As you can see in the next image, the clients are separated into the implementation of the interfaces and a feign resources. This is to keep everything small and manageable.
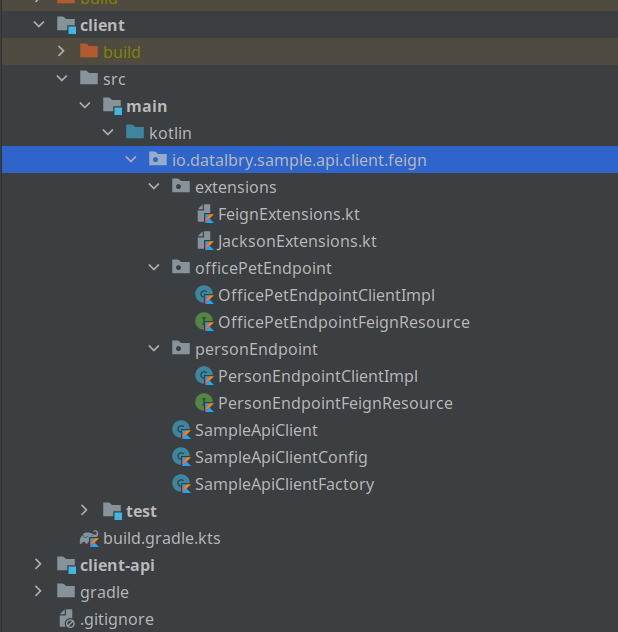
In the end is the SampleApiClient a facade (delegation of the client fragments).
To now actually use this client you firstly need to run the docker container with the API. Next you need to add in
your ~/.gradle/gradle.properties the following line:
First the gradle build script sets an environment variable from this property. This is because the configuration requires of the client needs to know the URI of the API. If you choose a different port for the Sample API you can have to adjust the port here accordingly.
In the test is a sample usage of the client. You can find the test
in client/src/test/kotlin/io/datalbry/sample/api/client/feign/SampleApiClientTest.kt.
If you now start the test, it should pass.
Create A Connector#
In DataLbry's Connector SDK a connector consists of multiple processors. A processor is something that processes an edge
and produces new nodes. From the previous tree a processor would take the root-node, process it and create a new node,
like the for example Person. You define for every edge a processor in your graph.
This section will also utilize the already implemented project. Now you should open the sample api connector in the IDE of your choice.
Building Blocks#
The connector project usually is build by the following 5 blocks:
- Processors: Explained previously.
- Document: A Document is a searchable Record which has to have a globally unique identifier. Even amongst documents of different types.
- Record: A Record is a specifically annotated class which then can be stored in the backend.
- ContainerNode: A container node is a collection of nodes containing the keys for other documents. Usually they are named something like `KeyNode` and the container containing them are called `KeyNodeContainer`.
You may add utility functions or anything else. But the previously described blocks are the main part of connectors.
Diving Into The Connector#
Next we are going to dive into the connector and explore it step by step. We will add one element after another it.
First Processor#
First you should check out to the branch 00-first-processor-person-document
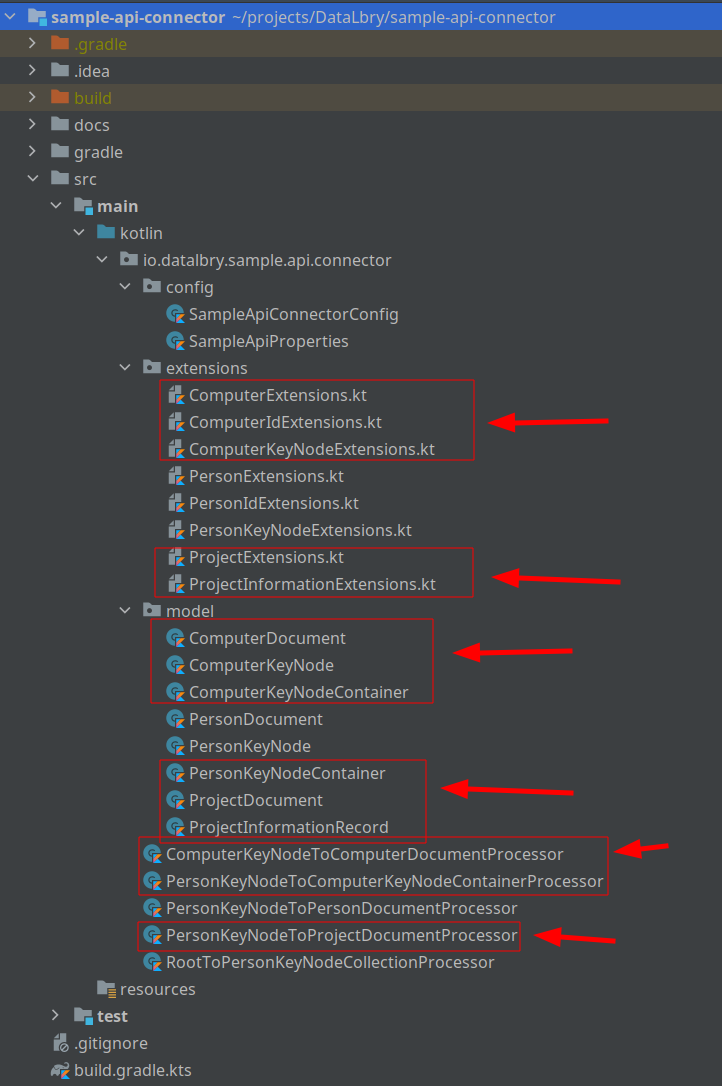
When you open the project you should see the following project structure:
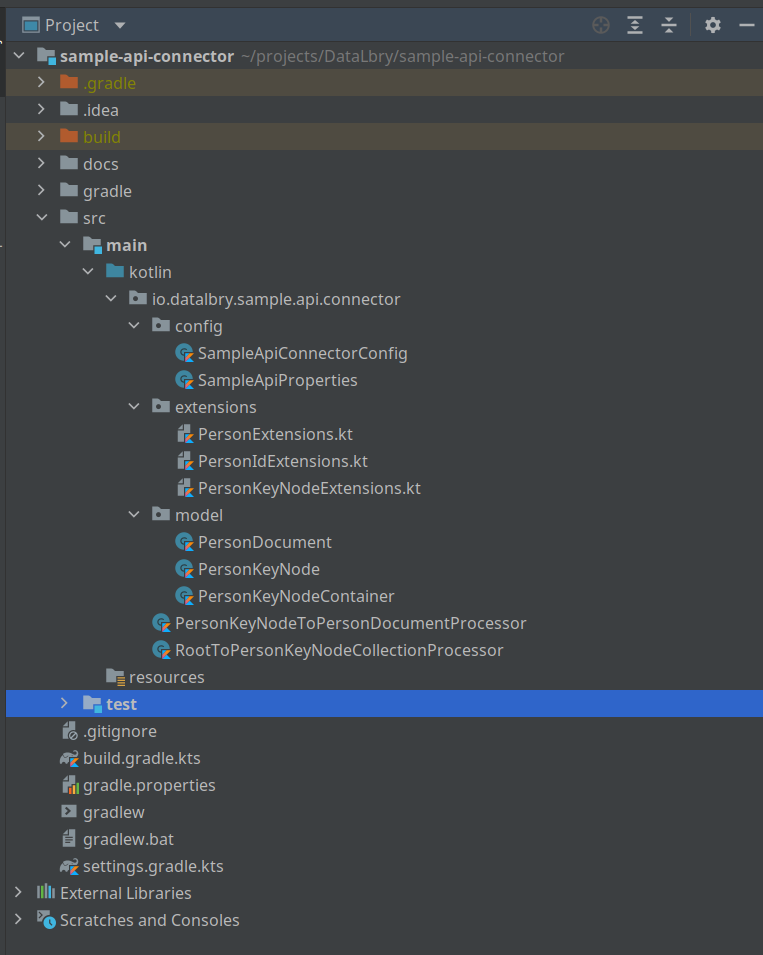
What you should notice here is that:
configpackage contains the properties which will be loaded via Spring and a connector config which will get the properties passed via dependency injection. This one expects
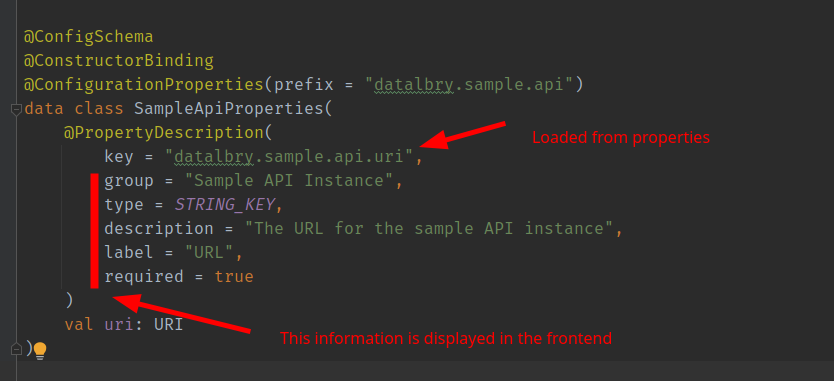
extensionspackage contains extension functions of all sorts. Here we convert back and forth as we needed from the client to the Documents/Records/KeyNodesmodelpackage contains all the model classesthe processors are just lying in the
io.datalbry.sample.api.connector
How do we come from the client api to the KeyNodes, KeyNodeContainer and such?
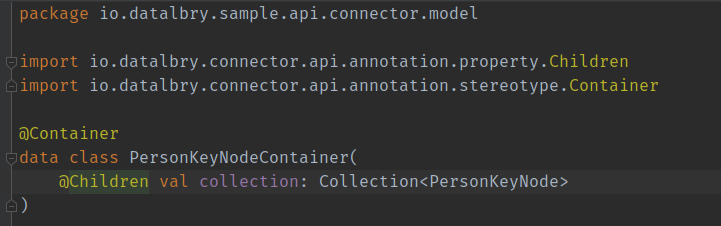
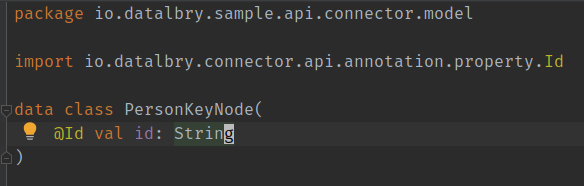
The PersonKeyNodeContainer contains the PersonKeyNodes, and they are annotated with @Children. This way we tell
the Connector SDK to give them to a processor and process them. In this case you see a collection of the KeyNodes but,
you can also just have one single KeyNode here. More on that later. For now the Connector SDK will start a
PersonKeyNodeToPersonDocumentProcessor for every PersonKeyNode in this container.
To sum it up, we have two processors:
RootToPersonKeyNodeCollectionProcessor, from the naming schema you can conclude that this processor starts from the root node and produces aPersonKeyNodeContainer. It should beContainerand notCollection.PersonKeyNodeToPersonDocumentProcessor, which takes aPersonKeyNodeand produces aPersonDocument.
Both of them basically wrap the client and convert the objects. You can take a look.
This results at this step into the following derivation tree:

Before we continue it is good to mention testing right now. You should always of course test your code. Next we are going to go through very simple integration tests which will basically verify the functionality.
src/test/kotlin/io/datalbry/sample/api/connector/extension/SampleApiConnectorTestExtension.ktsrc/test/kotlin/io/datalbry/sample/api/connector/SampleApiConnectorTest.kt
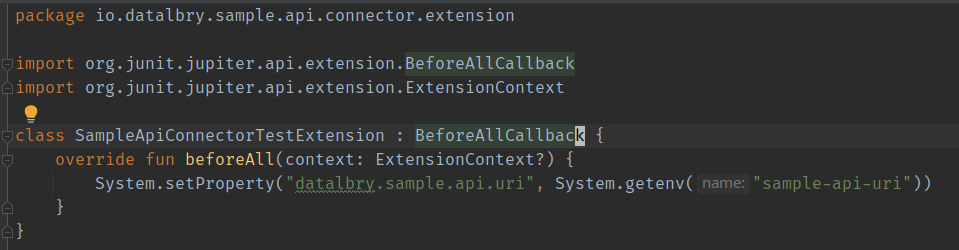
Let's start with SampleApiConnectorTestExtension. This just set's the properties from the environment and is loaded
by SampleApiConnectorTest.
Next is the actual test.
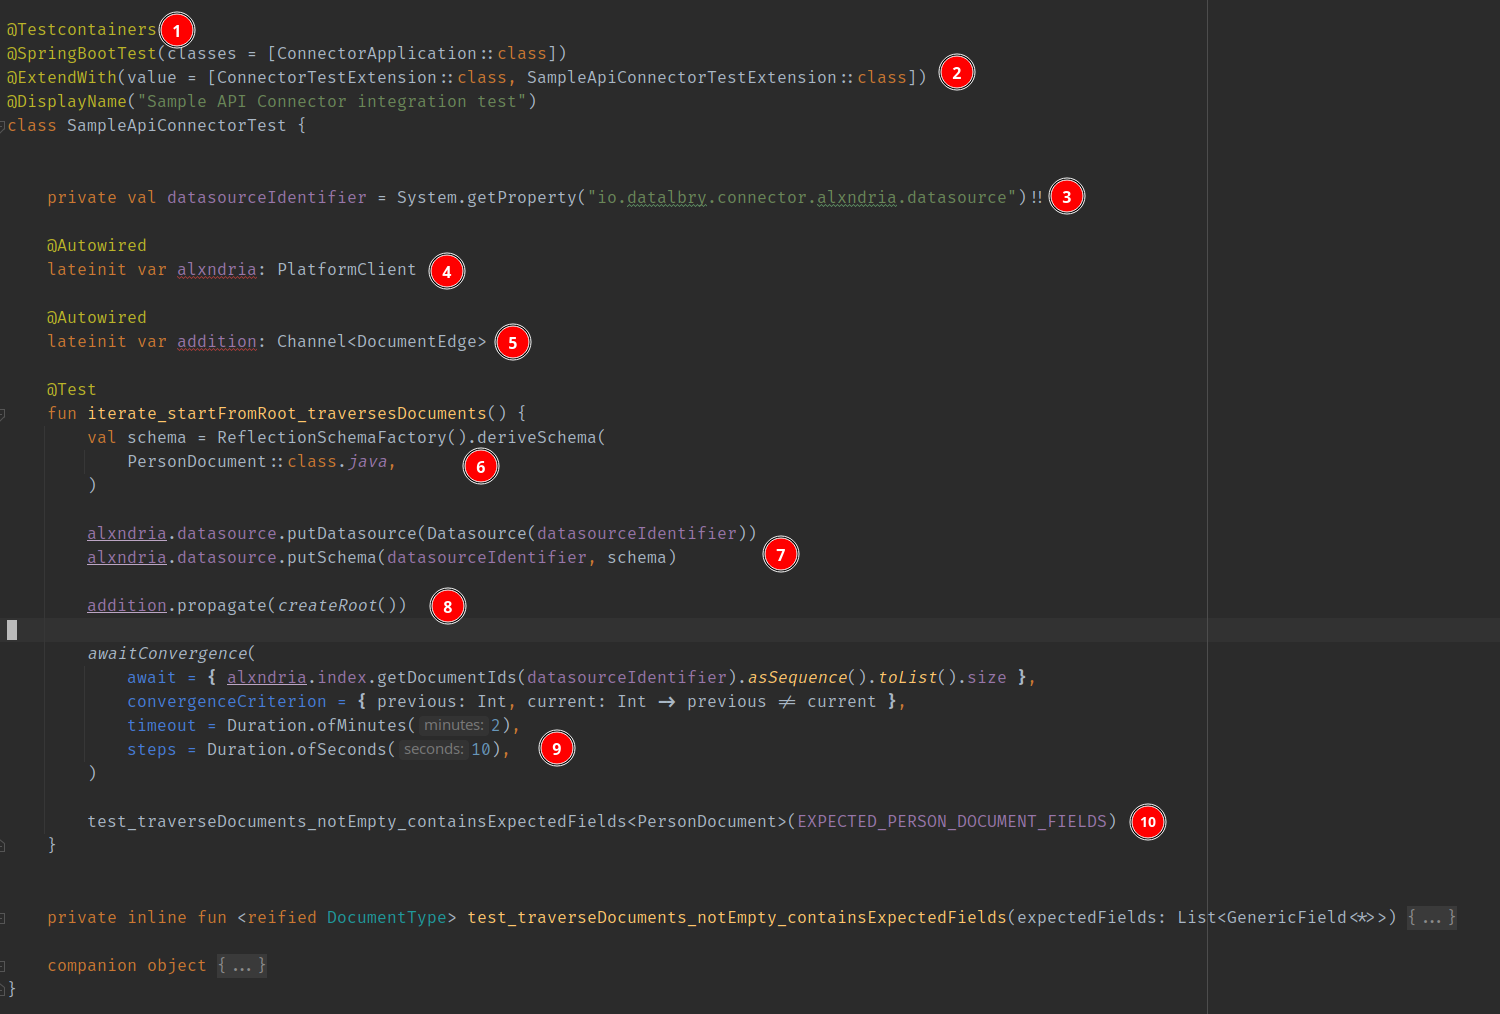
- This is setting up a docker container for data persistence
- Here we use the previous extension
- The path to the datasource. This is in this case set by the
ConnectorTestExtension - The data persistence client
Alxndria - The connector engine basically
- You HAVE TO REGISTER ALL DOCUMENTS AND RECORDS here. Everything you want to persist into the backend has to be registered here!
- Registering the data source at the given datasource identifier and the schemas.
- Start the connector (propagating through the tree)
- The propagation happens in the backend right now with an AMPQ channel. This is why we wait here.
awaitConvergencewaits for the number of elements (given byawait) and checks everystepsseconds if the size of the datasource does not change. - Then the test are run. Here we perform some test with this utility function.
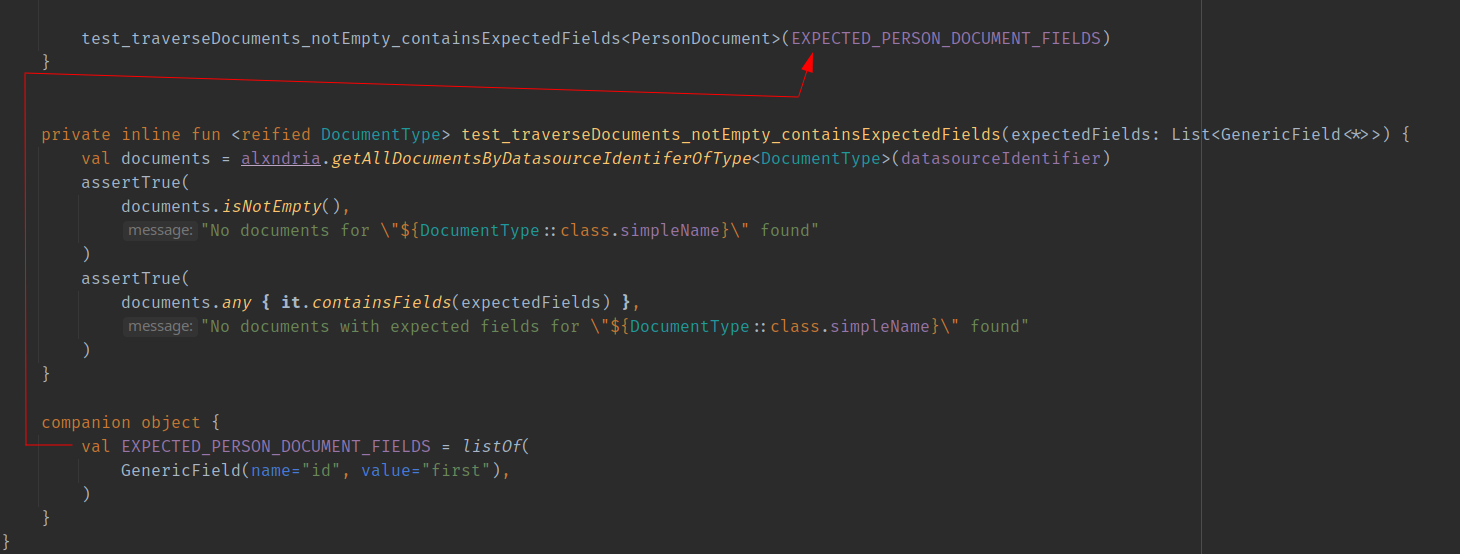
This utility function fetches does:
- fetches all documents of the given type
DocumentType - checks if not empty
- checks if there is a document which contains the expected fields
Second Layer#
For this part please check out at the branch 01-processing-second-layer-documents
Now we are going to extend the connector and add documents which are deeper inside the API. Documents which are more or less indirectly reachable. This means we will have more processors. So let's see what has been added.
Following has been added:
- Document, KeyNode and KeyNodeContainer about the Computer
- ProjectDocument and ProjectInformationRecord about the Project
- Extension functions to transform them
- Three new processors.
To remind you why there is no KeyNode and KeyNodeContainer for the Project: The API didn't offer us anything to access
it like this. So here the connector just fetches the list of Projects as the API provides us. Hence, we just take the
PersonKeyNode and produce a collection of ProjectDocuments.
Additionally, the tests have been extended accordingly.
Lastly the derivation tree at this step looks like this:

Last Branch From Root#
Lastly we have to cover the remaining part from the root node. For this part please check out at the
branch 02-processing-office-pets
This part of the documentation covers a case where we can retrieve a collection of documents. We don't have a possibility to get them by their id. Hence, we can't first get the KeyNodeCollection, then the KeyNode and lastly the Document itself. In the case of the OfficePetDocument we will proceed as follows. The OfficePetDocument looks like this:
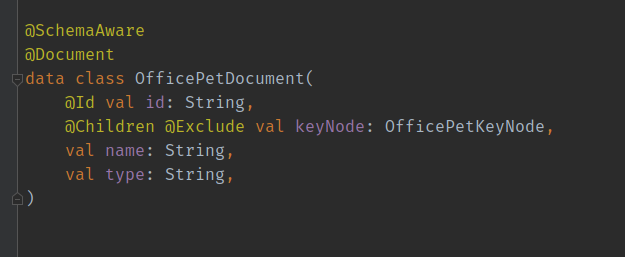
In this particular case we will include the KeyNode into the Document. The Connector SDK knows by the @Children
annotation that this value should be passed to another processor. Additionally, the @Exclude annotation prevents this
attribute to persist into the final schema. Meaning that the keyNode will not appear in the database.

Sources#
- To create the graphs we used this extension for IntelliJ IDEA: https://plugins.jetbrains.com/plugin/15635-diagrams-net-integration